
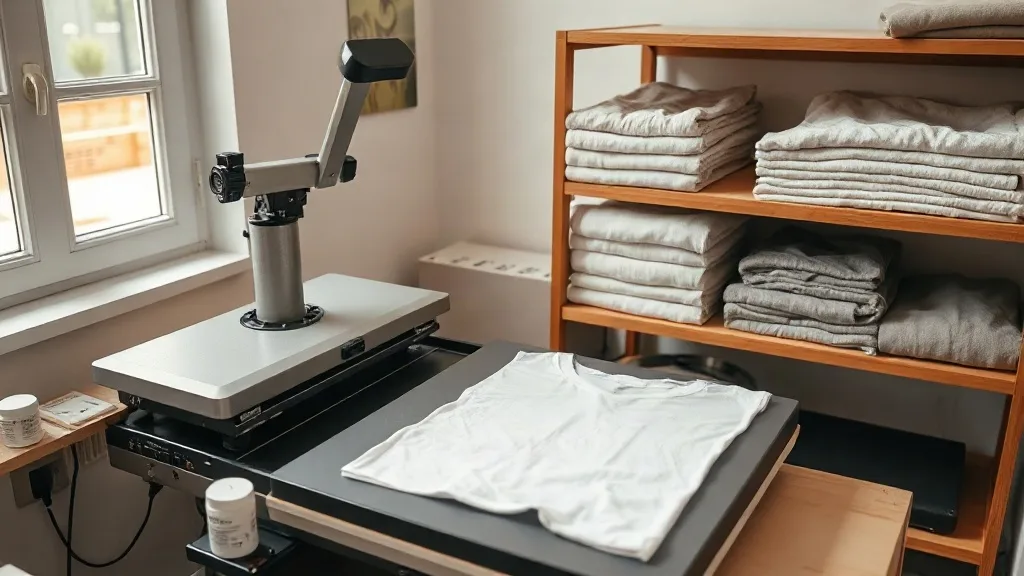
Most people who look into dtf transfers are chasing the same thing: full-color prints on a handful of shirts without buying a screen setup for every design. That part is real. What rarely gets mentioned is that a heat press, a decent printer, and a stack of film will not carry you on their own. The blank shirt you press onto matters just as much as the transfer itself, and the gap between a soft, well-made blank and a cheap one shows up the moment the shirt comes out of the press.
This guide walks through the practical side of running dtf work: what the gear actually costs, which fabrics cooperate, and how to pick blanks that hold up after twenty washes. If you are weighing whether to add printed tees to a small brand or a side business, the details below should save you a few expensive mistakes.
What DTF Actually Is, Without the Marketing Language
Direct-to-film printing means a design gets printed onto a coated film in reverse, dusted with adhesive powder while the ink is still wet, cured, and then pressed onto fabric with heat. The film peels away and what stays behind is a flexible layer of pigment glued to the garment.
The reason this matters for small operations is the order of operations. You can print fifty different designs in one afternoon, cure them, stack them in a drawer, and press them only when someone orders. No screens, no color mixing, no minimum quantity per design. That flexibility is the entire pitch, and it holds up in practice.
The tradeoff is that you are now responsible for a printer that needs maintenance, film that needs to stay dry, and a press that needs consistent temperature. It is a production process, not a magic trick.
Why the Powder Step Cannot Be Skipped
The adhesive powder is what bonds ink to fabric. Skip it, under-apply it, or cure at the wrong temperature and the print will look fine on day one and start cracking at the edges within a month. Most beginner complaints about durability trace back to this single step rather than to the film itself.
The Real Startup Numbers
Anyone claiming you can start for a couple hundred dollars is either leaving out the press or planning to use an iron on a kitchen table. Here is a realistic breakdown of what a functioning setup costs, based on commonly available equipment.
- Heat press: a 15x15 inch clamshell or swing-away runs roughly $250 to $500. Do not buy a tiny hobby press if you plan to do adult-size backs.
- Printer: a dedicated DTF printer with white ink channels starts around $1,500 and climbs quickly. Many people convert an existing EcoTank-style printer instead, which is cheaper but comes with its own maintenance headaches.
- Film and powder: expect $0.50 to $1.50 per A4 sheet depending on volume and supplier.
- Inks: a full set including white typically lands between $100 and $250.
- Curing: a heat gun works for very low volume, but a curing oven or dedicated powder shaker pays for itself fast once you pass a few dozen prints a week.
Add ventilation, a work surface, and some kind of humidity control and you are looking at somewhere between $2,500 and $4,000 to be genuinely operational. That is not a small number, which is why many people start by ordering pre-printed transfers from a supplier and pressing them at home. It keeps the press as the only major purchase and lets you learn the pressing side before committing to the printing side.
The Hidden Cost Nobody Budgets For
Waste. Your first month will involve clogged white channels, misfed film, powder applied too heavily, and prints pressed at the wrong pressure. Budget for a learning curve of roughly 20 to 30 ruined sheets before your output stabilizes. It is normal and it is not a sign that you bought the wrong equipment.
Which Fabrics Cooperate and Which Fight Back
DTF is more forgiving than vinyl or screen printing, but it is not universal. The adhesive needs a surface it can grip, and heat behavior varies a lot across materials.
Cotton and cotton blends are the easiest starting point. The print sits cleanly, stretches reasonably with the fabric, and survives washing well when pressed correctly. Polyester works too, but you need to lower the press temperature, otherwise the fabric can glaze or the print can scorch. On high-polyester performance wear, expect a slightly stiffer hand feel because the ink does not sink in the way it does on cotton.
Where it gets tricky is with coatings and treatments. Water-repellent finishes, heavy silicone softeners, and some moisture-wicking treatments actively prevent adhesion. If a garment has a finish you cannot identify, press a small test patch on an inside hem before running a full order. That single habit will save you from reprinting an entire batch.
Nylon, treated canvas, and heavily textured knits are the usual problem children. They can work, but they need testing and sometimes a lower temperature with a longer dwell time.
Why the Blank Shirt Decides the Outcome
Here is the part that separates a print that looks professional from one that looks like a craft project. A transfer pressed onto a thin, poorly constructed tee will crack, warp, and drag the fabric down with it. The garment has to hold its shape through the heat and through the wash cycles that follow.
This is where blank selection stops being an afterthought. Brands like shaka wear have built a following among small print shops for exactly this reason: heavier fabric weights, consistent sizing, and a surface that takes heat well without distorting. A 6 oz or heavier cotton tee gives the adhesive something stable to bond to, and the print stays flat instead of puckering around the edges.
Consistency matters as much as weight. When you buy the same blank repeatedly and it behaves the same way every time, you can lock in your press settings and stop guessing. Shifting between suppliers with different fabric compositions means recalibrating constantly, and that is where quality drifts.
What to Check Before You Buy a Blank in Bulk
- Fabric weight. Below 5 oz, expect the print to feel heavy relative to the shirt.
- Fiber content. 100% cotton is the safest bet for a clean finish.
- Pre-shrunk or not. An unshrunk tee that shrinks 8% will pull the print with it.
- Colorfastness. Cheap dyes can bleed into white ink during pressing.
- Availability in your size range. Nothing worse than a great print you cannot restock.
Press Settings That Actually Work
Exact numbers vary by press and film brand, so treat these as starting points and adjust from there.
For cotton, a common range is 150 to 160 degrees Celsius for 10 to 15 seconds with medium to firm pressure. Peel either hot or cold depending on the film, and always check the supplier's instructions because hot peel and cold peel films are not interchangeable.
For polyester, drop to around 130 to 140 degrees Celsius and reduce pressure slightly. Higher heat on synthetic fabric can cause the print to sink in and lose definition, or cause the garment to shine where the press touched it.
After peeling, a second press of 5 seconds with a cover sheet or parchment improves wash durability noticeably. It is a small extra step that many people skip and later regret.
Common Mistakes That Cost Real Money
Pressing on a damp shirt is probably the most frequent one. Moisture turns to steam under the platen and prevents proper bonding. Pre-press the garment for a few seconds to drive off moisture before applying the transfer.
Over-powdering is the second. Excess adhesive powder leaves a crunchy texture and can transfer onto the press platen, which then contaminates the next shirt. Shake off the excess thoroughly before curing.
The third is skipping the test press. Every new blank and every new film batch deserves one sacrificial print. It takes two minutes and prevents a wasted order.
Frequently Asked Questions
How many washes do DTF prints typically survive?
With correct powder application, proper curing, and a second press after peeling, most prints hold up for 50 or more home wash cycles. Cracking usually comes from under-cured powder or washing inside out at high heat, not from the film itself.
Can I use DTF on dark shirts and light shirts equally?
Yes, and this is one of its main advantages. White ink acts as a base layer, so full-color designs show up on black shirts the same way they do on white ones. The only adjustment is slightly more careful pressing on very dark dyes that may bleed.
Is it cheaper to order pre-printed transfers or buy a printer?
For anything under roughly 100 prints a month, ordering transfers is usually cheaper once you factor in ink, film, maintenance, and waste. A printer starts making financial sense at higher, consistent volume where the per-unit cost drops below supplier pricing.
Do I need a special press for DTF?
No. A standard heat press with adjustable temperature and pressure works. What matters is that the press holds temperature steadily and that the platen is large enough for your biggest design. Clamshell presses are fine, though swing-away models make loading easier on larger orders.
What happens if I press the film at too high a temperature?
The ink can over-cure and become brittle, which leads to cracking at the edges. On synthetic fabrics, excessive heat can also scorch the garment or cause the print to lose sharpness. When in doubt, start lower and increase in small increments.