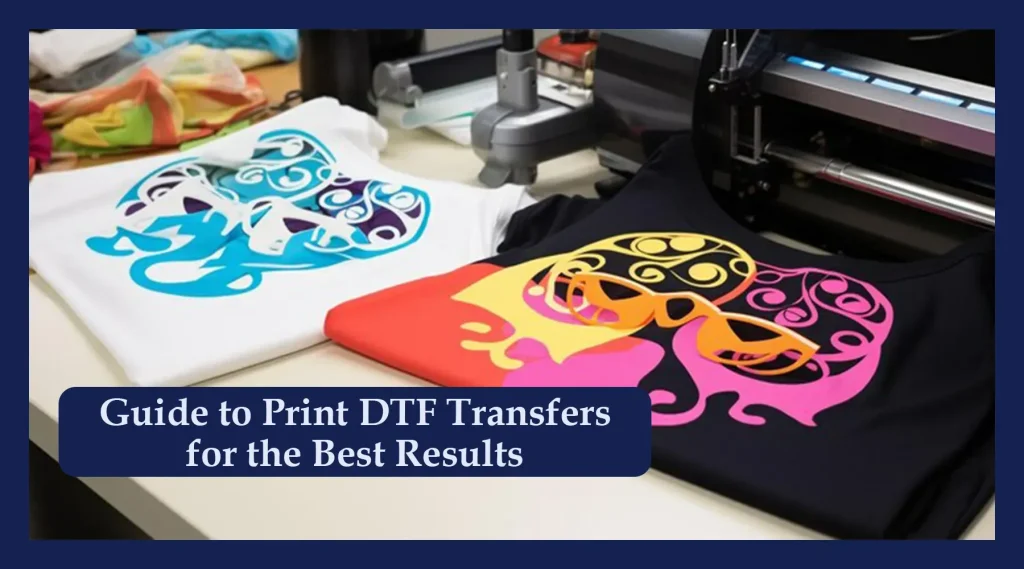
DTF transfers offer a vibrant, durable way to decorate garments and fabrics and are the focus of this introductory guide, useful for artists and makers seeking reliable results across apparel and home textiles. This article covers DTF transfers troubleshooting, addressing common DTF printing issues and the factors that can affect results. We’ll explore heat press settings for DTF and common DTF adhesion problems, with practical tips to improve bonding and consistency. By following clear steps and best practices, you can achieve more consistent color, sharper details, and improving DTF transfer quality. Whether you are new to DTF or seeking optimization tips, this descriptive overview sets the stage for successful projects.
A direct-to-film printing approach, also described as film-based textile decoration, applies ink to a transfer sheet that is later bonded to fabric. This alternative framing covers the same outcome—bright colors, durable adhesion, and sharp detail—while using different workflow terms. Key elements to consider include ink curing, film quality, and powder bonding, all of which influence the final transfer. In an LSI-aware view, related topics such as color management, substrate prep, and post-press care are explored to reinforce a cohesive understanding of the process.
DTF Transfers Troubleshooting: Core Causes and Quick Fixes
DTF transfers troubleshooting is about tracing the transfer path from design to wear and identifying where things can go wrong. It involves printer mechanics, film quality, inks, adhesive powders, heat press settings, and fabric selection, and how each of these elements affects transfer fidelity.
In practice, common DTF printing issues include incomplete transfers, ghosting, color shifts, and peeling after washing. A focused approach starts with a controlled test print on the target fabric, then verifies heat press timing, temperature, and even pressure, ensuring the ink cures properly before coating with adhesive powder to minimize defects.
Optimizing Heat Press Settings for DTF to Boost Transfer Quality
The heat press is the final gatekeeper of color vibrancy and adhesion. Fine-tuning heat press settings for DTF means dialing in temperature, dwell time, and pressure for your film and fabric combination to avoid scorching, color bleed, or incomplete transfers, which directly impacts improving DTF transfer quality.
Begin with manufacturer guidelines and run swatches across different fabrics—cotton, blends, and synthetics—to find a stable window. Verify that the transfer film’s recommended temperature and dwell time are matched to your fabric, and ensure even pressure with a reliable platen to maintain consistent results.
Diagnosing DTF Adhesion Problems Across Fabrics
DTF adhesion problems are frequently tied to curing and bonding steps. If the printed ink does not cure fully before applying adhesive powder, or if the bonding powder is uneven, adhesion will suffer. Address these issues by confirming proper curing temperatures and times, and by checking that the powder bonds uniformly to the film.
Experiment with fabric compatibility, pre-treatments, and barrier layers when necessary. Testing adhesion on a small fabric sample before committing to a full garment helps you identify fabric-specific challenges and reduce costly misfires later in production.
Troubleshooting Color and Alignment: Reducing Ghosting in DTF Transfers
Color management and precise alignment are critical to prevent ghosting, misalignment, and color shifts. Ghosting can arise from misaligned layers, improper tension, or ink that bleeds beyond intended areas. Tackling these issues starts with clean printer output, sharp color management, and careful layer alignment.
Use alignment marks, templates, and fabric stabilization to maintain consistent placement during pressing. Calibrate color profiles, verify ICC settings, and run nozzle checks to ensure the design prints cleanly, helping to minimize DTF printing issues and improve overall transfer quality.
From Design to Durability: A Practical Workflow to Improve DTF Transfer Quality
A repeatable workflow begins with establishing baseline test prints, documenting printer settings, film, powder, and heat press parameters for each fabric. This approach aligns with the broader concept of improving DTF transfer quality by creating a traceable process that reduces human error and yields consistent results.
Proceed through a structured sequence from design to curing to final press, then perform wash and wear trials to assess durability. Keeping a log of outcomes—issues, fixes, and final results—helps you refine heat press settings for DTF, powder bonding, and post-press care, driving measurable improvements in transfer quality over time.
Frequently Asked Questions
DTF transfers troubleshooting: what are the first steps to diagnose incomplete transfers and ghosting?
Start with a controlled test print on the fabric you plan to decorate to establish a baseline. Check printer calibration, ICC profiles, and color management to ensure sharp color reproduction. Verify heat press parameters (temperature, time, pressure) for your specific film and fabric, and ensure even adhesive powder coverage after printing. Confirm the ink cures properly before powdering and inspect the transfer film quality. Use alignment marks to rule out misalignment. These steps help identify whether issues stem from the printer, film, curing, or press settings and guide precise fixes.
What heat press settings for DTF are most critical to prevent color bleeding and adhesion problems?
Temperature, dwell time, and pressure are the critical trio for heat pressing DTF transfers. Start with manufacturer guidelines and run small tests on the target fabric to find the optimal combo that yields complete transfer without scorching or bleed. Ensure the fabric is stabilized and the transfer is aligned, and avoid excessive pressure that can cause color bleed or film cracking. Verify that the ink has cured sufficiently before powder bonding, and adjust dwell time as needed based on results to improve adhesion.
Which common DTF printing issues should I watch for, and how can I fix them quickly?
Watch for miscalibrated output, dull colors, ghosting, or incomplete transfers. Fix by recalibrating color profiles, performing nozzle checks, and ensuring consistent ink flow. Confirm the transfer film and inks work well together and that the ink cures properly before applying adhesive powder. Run test prints on your fabric, adjust ICC profiles, and verify printer settings until the printed design matches the intended artwork.
How can I improve DTF transfer quality through better color management and curing?
Improve quality by tightening color management: calibrate the printer, update ICC profiles, and ensure reliable nozzle health. Use high-quality transfer film and bonding powders, and verify the ink cures fully before powdering. Maintain consistent powder distribution and proper curing temperature and time. Conduct baseline tests on representative fabrics, document results, and adjust settings to reproduce reliable, vibrant transfers.
What causes DTF adhesion problems and how do I fix peeling after washing?
DTF adhesion problems typically arise from insufficient curing, weak adhesive powder bonding, or fabrics that don’t respond well to the transfer. Fix by extending curing time and temperature within film guidelines, ensuring even adhesive powder bonding, and selecting fabrics compatible with the transfer system. After washing, follow recommended post-press care and perform wash tests on similar fabrics to confirm durability and reduce peeling.
| Topic | Key Points |
|---|---|
| Common issues | – Incomplete transfers or missing areas: Causes include insufficient heat or pressure, uneven powder coverage, or ink that did not cure properly before coating with powder. Fix: test print and carefully check heat press timing, temperature, and pressure. – Cracking or cracking lines: Occurs in fine details or large color blocks, especially after washing. Causes: overly thick film, poor ink adhesion, or excessive pressure. Remedy: adjust film thickness, ensure proper curing before powdering, and use moderate pressure with proper dwell time. – Ghosting or shadowing: Faint repetitions outside the intended area. Causes: misalignment between layers, improper fabric tension, or residual ink bleeding. Fix: recheck alignment marks, stabilize fabric, and ensure clean printer output with proper color management. – Peeling or flaking after washing: Indicates poor adhesion. Causes: insufficient curing, inadequate adhesive powder bonding, or fabrics not compatible with adhesive. Address by adjusting curing time/temperature, improving adhesive bonding, and selecting compatible fabrics. – Color shifts, bleeding, or dull colors: Can result from miscalibrated ink, moisture in film, or inconsistent powder coverage. Remedy: recalibrate color profiles, verify film/ink quality, ensure consistent powder coverage and cure. – Misalignment of design: Common on curved/uneven surfaces or when film shifts. Fix: careful garment alignment, fabric stabilization, and templates/guides for precise placement. – Backing residue or texture: Residue or rough texture from incomplete curing, powder under-bonding, or aggressive pressing. Adjust curing, verify powder distribution, inspect fabric for residue. – Stains or dye migration: Some fabrics/pre-treatments cause dye bleed. Fix: select compatible fabrics, perform wash tests, use barrier layers or proper pressing temps. |
| Root causes behind DTF transfer problems | – Print quality and color management: Lacking sharpness or color accuracy due to misconfigured printer settings, incorrect ICC profiles, or inconsistent ink flow. – Ink curing and powder bonding: Ink must cure before applying adhesive powder; under-curing causes poor bonding and ghosting; over-curing harms color vibrancy and film integrity. – Film and powder quality: Poor quality film or bonding powders lead to uneven transfer, flaking, or poor adhesion on certain fabrics. – Heat press settings and technique: Temperature, time, and pressure combination affects results; too much heat or long dwell can cause bleeding or scorching; too little heat yields incomplete transfer. – Fabric type and prep: Some fabrics absorb adhesive poorly or react differently to heat; pre-treatment or fabric choice helps. – Handling, alignment, and finishing: How the garment is handled and post-press steps (peel timing, washing after curing) impact durability and appearance. |
| A practical troubleshooting workflow for DTF transfers | 1) Establish baseline with controlled test prints on the same fabric, recording printer settings, film, powder, and heat-press parameters. 2) Check alignment and fabric stabilization: ensure flat, wrinkle-free fabric; use alignment marks/templates; use flat heat press with even pressure. 3) Inspect powder application and curing: apply powder evenly and cure per film instructions; uneven powder can compromise adhesion; reassess curing if needed. 4) Validate printer output and color management: run color calibration/nozzle check; update ICC profiles; ensure prints match design; inconsistent ink drying can cause ghosting or color shifts. 5) Re-evaluate heat press settings and dwell time: ensure temperature is within film/fabric guidelines; adjust in small increments and test. 6) Perform wash and wear trials: test durability after multiple wash cycles and garment care. |
| Best practices to prevent DTF transfer issues | – Use high-quality materials: reliable DTF inks, compatible transfer film, and bonding powders to ensure consistent film quality and powder distribution. – Calibrate and test regularly: regular printer calibration and color management; maintain a log of settings for different fabrics and film batches. – Control environment and fabric prep: stable humidity/temperature; pre-wash or pre-treat fabrics as recommended; ensure fabrics are dry and wrinkle-free before transfer. – Optimize heat press settings for substrates: adjust pressure, temperature, and time for different fabrics (cotton, blends, synthetics). – Develop a standardized workflow: repeatable process covering printing, powder application, curing, alignment, transfer, peeling, and post-press care. – Document and compare results: keep logs of test outcomes to identify patterns and refine future projects. |
| Concluding thoughts | Note: If you want, I can add a short summary here, but the key takeaway is that DTF transfers benefit from a structured workflow, quality materials, and careful attention to heat, timing, and finishing to achieve durable, vibrant designs across diverse fabrics. |
Summary
DTF transfers offer exciting possibilities for apparel and product decoration, but the technique requires careful attention to materials, process, and finishing steps. Understanding common issues and their fixes helps transform problems into learning opportunities and lets you deliver durable, high-quality designs on a wide range of fabrics. By following a structured troubleshooting workflow, investing in quality supplies, and maintaining a consistent process, you can minimize issues and maximize the impact of your DTF transfer projects. With practice, you will gain confidence in your ability to optimize heat press settings, improve adhesion, and achieve crisp, vibrant results that clients and customers will love.