DTF transfers have transformed how designers and hobbyists bring vibrant, durable graphics to fabrics, expanding creative control over apparel, bags, and home decor while delivering a soft hand feel, strong color fidelity, and wash-fast durability that makes this method practical for both small runs and one-off projects. If you’re evaluating textile printing options, this introductory guide sits at the crossroads of practicality and craft and covers DTF transfer printing, how to apply DTF transfers, DTF transfer settings, DTF heat press tips, and DTF on fabric to help you select the right workflow for your designs. From material selection to post-press finishing, the plan breaks down essential steps, including fabric prep, precise transfer placement, calibrating temperature and pressure, and guidance on whether to hot-peel or cold-peel, so you can reproduce consistent results across cotton, blends, and synthetics; this includes guidance on creating swatch tests, logging results, and adjusting technique for different fabric mills and suppliers so you can replicate outcomes with confidence. We’ll also explore how fabric type, color depth, stretch, and texture influence outcomes, helping you anticipate issues such as color drift, edge lifting, or a stiff hand, and offering practical tips like using protective sheets, a pre-press, and proper cooling to lock in the design; it also covers troubleshooting steps for common heat-transfer questions and notes on whether to adjust dwell time or pressure when switching to heavier fabrics. With careful tuning of settings and a practiced workflow, you’ll gain confidence delivering vibrant, durable prints that look professional and endure repeated wear without sacrificing comfort; practice runs and a simple checklist will help you streamline production and maintain consistency across items.
From an LSI perspective, this technique is commonly described as direct-to-film printing for textiles, a film-based transfer method that bonds a printed graphic to fabric using heat and pressure. Practically speaking, you’ll encounter terms like textile film graphics, adhesive-coated transfers, or heat-applied graphics on fabric—each describing the same workflow of moving a design from a prepared film to a garment or textile. By foregrounding related concepts such as surface decoration via heat transfer, durable fabric graphics, and layer-based adhesion, the topic becomes clearer to both readers and search engines, illustrating how DTF shares ground with other coating and printing techniques.
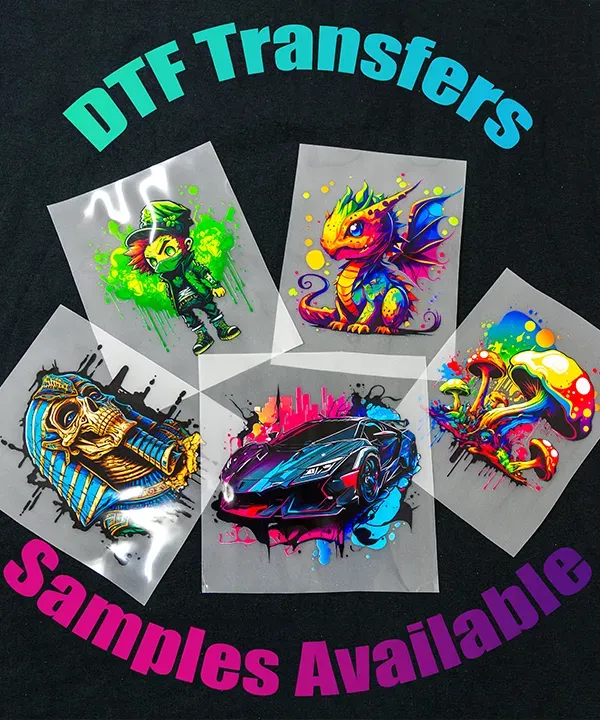
DTF Transfers: Printing Designs with Direct-to-Film Technology
DTF transfers refer to a direct-to-film process where designs are printed onto a clear film using a specialized printer, then prepared with an adhesive powder and cured before application. This method, often described as DTF transfer printing, yields bold colors, sharp details, and a soft hand on fabric when heat pressed. By understanding the basics of DTF transfers, you can anticipate how the transfer behaves on different substrates and how it will look once applied to fabric.
DTF transfers are versatile for a wide range of fabrics, from cotton and cotton blends to poly blends, and even blends used in activewear. The technique includes using a white underbase for dark fabrics to preserve color fidelity and maintain high contrast. Compared with traditional screen printing or iron-on methods, DTF transfers provide excellent scalability for small batches, faster turnaround, and easier color adjustments on complex designs.
How to Apply DTF Transfers: A Step-by-Step Guide
This section covers practical steps for applying DTF transfers, including how to apply DTF transfers with precision. Start with a pre-press to remove moisture and flatten the fabric, then position the transfer using reference marks or tape to ensure accurate alignment. The goal is to minimize shifting during pressing while maintaining sharp color edges and clean registration.
Once aligned, cover the transfer with a protective sheet and apply heat at the recommended temperature and dwell time for your fabric—typically around 315–320°F (158–160°C) for 10–15 seconds with firm, even pressure. After pressing, decide whether you’ll peel while hot or cool for a cold peel, following your specific transfer’s instructions. This step is crucial for bond strength and color clarity, influencing how well the design remains intact during washing.
DTF Transfer Settings: Dialing in Temperature, Time, and Pressure
DTF transfer settings encompass the key variables that determine bond strength, color accuracy, and durability. Start with manufacturer-recommended guidelines and then tailor temperature (commonly 300–340°F / 150–171°C), time (about 8–15 seconds), and pressure to the fabric weight and transfer type. Keeping precise records of these values helps reproduce consistent results across batches and different fabric types.
Fine-tuning often involves small test runs on a sample fabric weight to capture how the adhesive behaves under heat and pressure. Documenting your settings for each fabric and transfer brand enables reliable replication, supports color balance, and reduces color drift or misregistration over time. Regularly validating pressure uniformity and dwell time is essential for long-term consistency in your DTF workflow.
DTF Heat Press Tips for Consistent, High-Quality Results
DTF heat press tips emphasize consistent temperature control, even pressure, and proper material protection. Use a silicone pad or teflon sheet to shield the substrate and ensure uniform heat distribution, and make sure the garment lies flat with no wrinkles before pressing. Regular calibration of the heat press, along with proper cleaning, helps maintain stable performance and repeatable outcomes across projects.
Additional tips include pre-pressing to remove moisture, using protective parchment during pressing, and avoiding movement of the transfer during the dwell time. For darker fabrics or high-detail designs, ensure a solid white underbase if required and verify that the transfer edges are fully adhered before cooling. These practices contribute to the longevity and wash-fastness of your DTF prints.
DTF on Fabric: Selecting Materials, Prep, and Care
DTF on fabric benefits from choosing substrates that respond well to heat and adhesive bonding. Light to mid-weight fabrics that are pre-washed and clean yield more predictable results, with cottons, cotton blends, and polyester blends being common choices. Dark fabrics may require thicker films or a white underlay to preserve brightness and maintain color fidelity.
Prepping fabric includes a thorough pre-press to remove moisture and wrinkles, followed by a cool-down period before the transfer is applied. After pressing, allow the garment to cool completely and follow care guidelines such as washing inside out in cold water and avoiding high heat on the print area. Proper care helps maintain the color, bond strength, and overall longevity of your DTF on fabric projects.
Frequently Asked Questions
What is DTF transfer printing and how do DTF transfers work?
DTF transfer printing is the process of printing a design on a special film, applying adhesive powder, curing, then using heat and pressure to transfer the design to fabric. The result is vibrant color, fine detail, and a soft hand feel that works well on cotton, polyester blends, and many fabrics. Compared with screen printing or iron-on options, DTF transfers offer excellent color fidelity and flexibility for small batches or custom items.
How to apply DTF transfers on fabric?
To apply DTF transfers on fabric: pre-wash and pre-press the garment to remove moisture. Center the transfer and cover with a teflon sheet, then press at about 315–320°F (158–160°C) with firm, even pressure for 10–15 seconds, without moving. Peel the transfer hot or cold per your system’s guidance, and allow the fabric to cool on a rack. If required by your process, complete any post-press curing steps.
What are common DTF transfer settings for different fabrics?
DTF transfer settings vary by fabric, transfer brand, and equipment. Start with common ranges: temperature 300–340°F (150–171°C), time 8–15 seconds, and firm, even pressure. Peel can be hot or cold depending on the adhesive and transfer specifications. Always run a test on scrap fabric and keep a log of successful settings to reproduce results.
What are some DTF heat press tips for best results?
DTF heat press tips include pre-pressing to remove moisture, using a protective teflon or parchment sheet, and ensuring flat alignment with even, firm pressure. Avoid moving the transfer during pressing, and maintain a stable, calibrated heat press. Regularly check calibration and follow any recommended curing steps for your specific transfer.
How should I care for DTF transfers on fabric to ensure longevity?
To care for DTF transfers on fabric and maximize longevity: wash inside-out in cold water with a mild detergent, and avoid high heat directly on the print (iron on the reverse side or with a protective sheet). Do not use bleach or fabric softeners that can degrade the bond, and store finished garments away from direct sunlight to prevent fading.
| Topic | Key Point |
|---|---|
| What are DTF transfers | Printed designs on film with adhesive powder; heat transfer to fabric yields soft, vibrant, washable results. |
| Applications | Ideal for apparel, bags, and home decor; works on cotton and polyester blends; supports small batches. |
| Workspace and tools | Clean, well-lit area with heat press; protective sheets, silicone pad or Teflon sheet, parchment paper; adhesive powders and curing equipment as needed. |
| Fabric prep & testing | Pre-wash fabric; test temperature/time/pressure on scrap to calibrate for color fidelity and bond. |
| Safety & setup | Ventilated area; pre-press to remove moisture; keep fabric flat; use protective sheets to prevent scorching. |
| Step-by-step basics | Pre-press; align transfer; apply heat/pressure; peel method; optional cure; cool; perform a final bond check. |
| Troubleshooting | Address color drift, edge lifting, cracking, or blurring by adjusting temp, time, and pressure; verify alignment and cure as needed. |
| DTF transfer settings | Temp 300–340°F (150–171°C); Time 8–15 seconds; firm even pressure; peel type hot or cold per spec. |
| Care & longevity | Wash inside out in cold water; avoid direct heat on print area; do not use harsh bleaches; store away from sunlight. |
| Advanced tips | Test on multiple fabrics; consider a protective top-coat; document and reuse successful settings; use reliable equipment. |